


3D Print instead of buying new: 7 spare parts you can create in minutes without CAD
Everyone knows the problem: a small part is missing, broken or no longer available - and suddenly a project or machine comes to a standstill. With parametric templates you can create these parts without CAD recreate: You enter the dimensions, check the preview and create a print-ready STL. Here are 7 real "everyday heroes" that you can configure quickly.
2-minute quick start: your standard workflow
- Choose a part category (hydraulics, assembly, boxes ...)
- 2-4 Measure core dimensions (diameter, length, hole spacing, wall thickness)
- parameters eintragen and check the preview
- generate STL → downloaden or have printed
Die 7 spare parts (with Mess-Tips & parametersn)

Perfect if you need a branch in the pipe/hose system and standard parts do not fit. You define the main pipe (X) and branch (Z) separately.
- parameters: X/Z lengths, inner Ø, outer Ø
- Mess-Tip: Inner diameter = flow; outer diameter = wall thickness/strength
- Variant: Branch length according to installation space

When bolt circle/boreholes must fit exactly: Configure flange + pipe connection to measure - ideal for repairs, conversions or prototypes.
- parameters: Flange diameter, thickness, bolt circle, hole diameter, hole count, tube diameter/inner diameter/length
- Mess-Tip: holekreis immer Center-to-Center measure
- Variant: Bolt circle matching the mating flanges

Classic for repairs: reinforce edges, build small holders, cleanly solve transitions. You define profile length, side lengths and material thickness.
- parameters: Profillänge, Schenkel X/Y, materialstärke
- Mess-Tip: Consider installation space + screw heads
- Variant: Kantenverstärkung & anglelösungen

When cables/pipes need to be fixed properly: You configure the angle, support and stability to suit the application.
- parameters: Inner/outer diameter, hole depth, tube angle, strut thickness and board thickness
- Mess-Tip: Outer diameter + some clearance → easy assembly
- Variant: Ø matching the tube dimension

Connect profiles/panels at a 90° angle - and define the drilling pattern to suit your structure.
- parameters: Legs A/B, width, material thickness and holes per side
- Mess-Tip: Keep hole count and edge distances realistic
- Variant: Hole pattern defined by holes per side

Protection for corners and edges (safety, feel, look). Ideal when standard caps do not fit.
- parameters: Width, inner/outer height, X/Y length
- Mess-Tip: Measure inside height according to edge profile + clearance for assembly
- Variant: Inner/outer height depending on profile
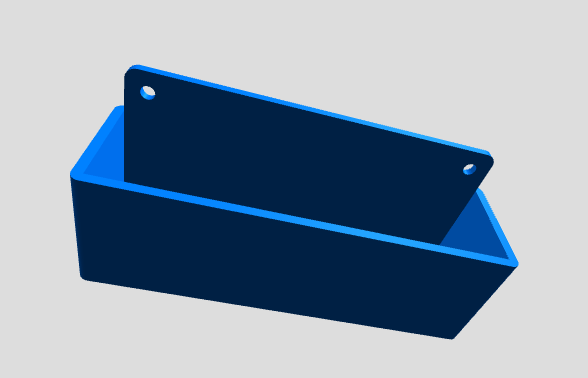
If electronics/modules are to be mounted neatly on the wall: Adjust dimensions, wall thickness and screw mounting directly to suit.
- parameters: Corner radius, L/W/H, wall thickness, screw hole Ø, flange height
- Mess-Tip: Internal dimension = part dimension + clearance (allow for cables/connectors!)
- Variant: Wall thickness depending on stability
material & Stabilität: simplee Regeln
- PLA: quick for prototypes (indoors, low heat)
- PETG: tough and practical for everyday use (brackets, profiles, boxes)
- ASA/ABSheat resistant / outdoor (ASA UV resistant)
- Nylon (PA)Ready for workshops and industrial use
Rule of thumb: When it might break → Wall thickness +1 step and a tough material (PETG/ASA/Nylon). This is the fastest "stability booster" without CAD.
Get started right away
Find a template, enter your dimensions and generate the STL. That's exactly what BuildYour3D is for: Custom part without CAD.
Also searched for:
Print replacement part 3D without CAD, STL without CAD, print angle holder, tube holder STL, Print customized corner protectors, hydraulic flange bolt circle, T-piece pipe branch, 3D printed wall-mounted enclosure.
FAQ
Which two or three dimensions are often enough?
Usually Ø/inner dimension, length and hole spacing if applicable. For boxes: Internal dimension (component + air) and wall thickness.
Why choose a category and template instead of designing from scratch?
You save time: the design is prepared, you only change parameters. This is ideal if you need a functioning part quickly.
What if I am unsure about tolerances?
Start with +0.2 to +0.6 mm for through-holes and +0.3 to +0.8 mm for push-fits. If in doubt, print a small test first.